Before Your Event
Step 1 - Create your event on Rubric
Any current Executive can login to Rubric and switch profiles to your Club's Rubric Account: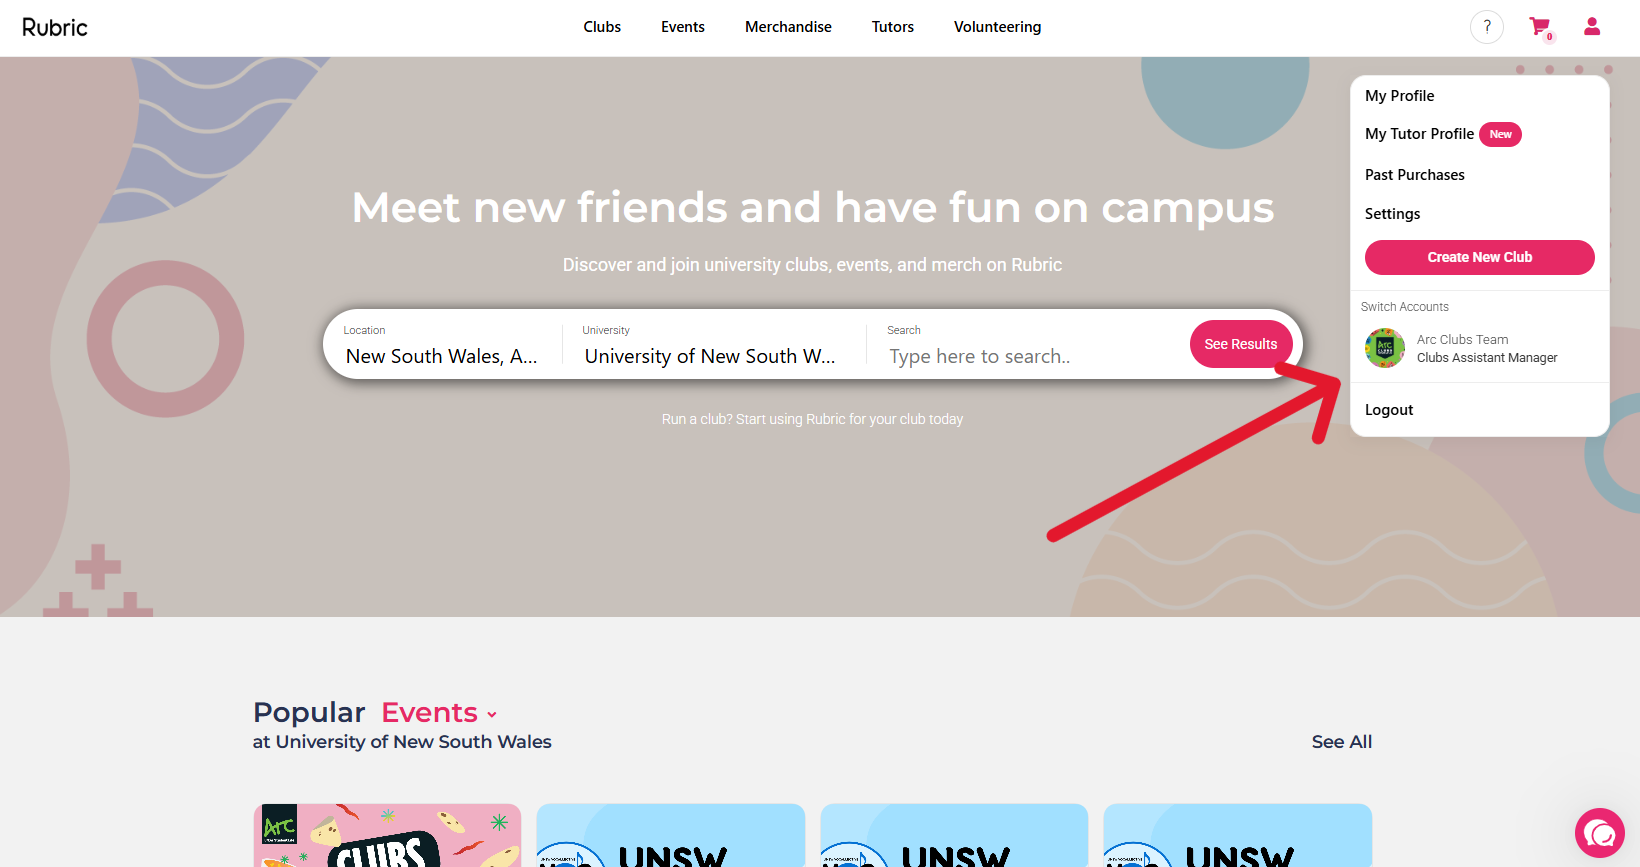
Once you are logged into the Club's page, click on the “Events” tab:
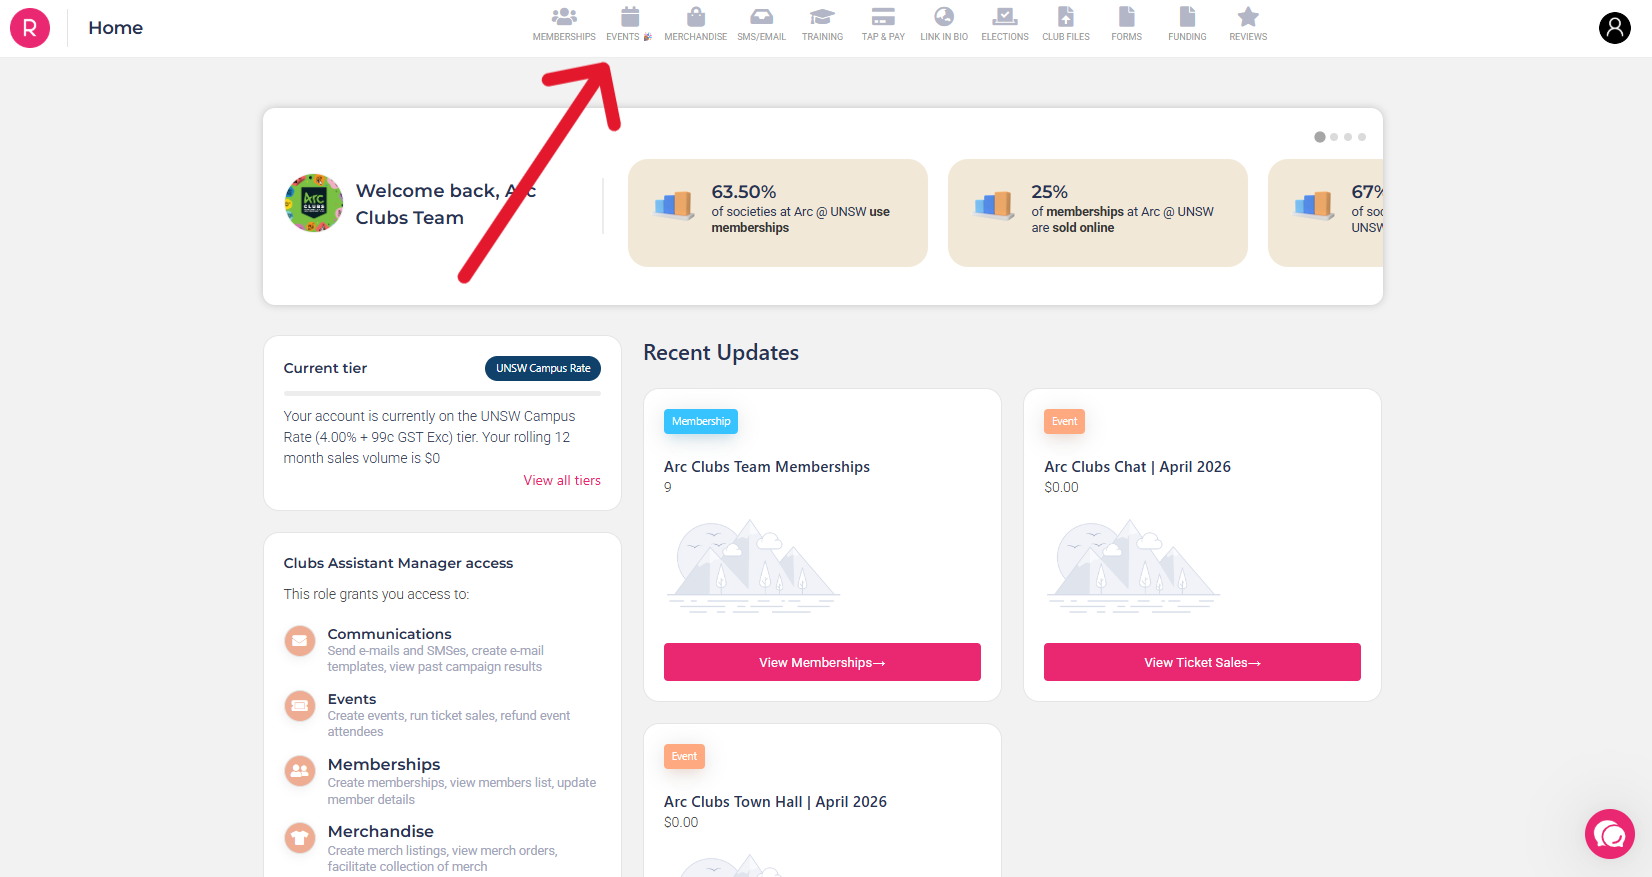
Then click the “Create Event” button to enter the Event Builder:

Then simply fill in your event details and click “Publish Event”!
Step 2 - Promote your event with the Arc Clubs Logo!
The event page is up so it’s time to market it! Make sure that your promotion material has the Arc Clubs logo displayed prominently to ensure your members know your event will be funded by Arc. You can find .png versions of the logo HERE 🔗
Step 3 - Keep track of your income & expenditure
Make sure you are entering your income and expenses for the event into an Excel Spreadsheet. This will keep you on track to ensuring you breakeven on the event as well as making your life easier when it comes to submitting for your grant later.
This spreadsheet does not need to be complex, simply capture the following headings:
Expenses
- Item Description
- Amount (with GST)
- GST Applied
- Total
Income
- Income Description
- Amount
- Total
During Your Event
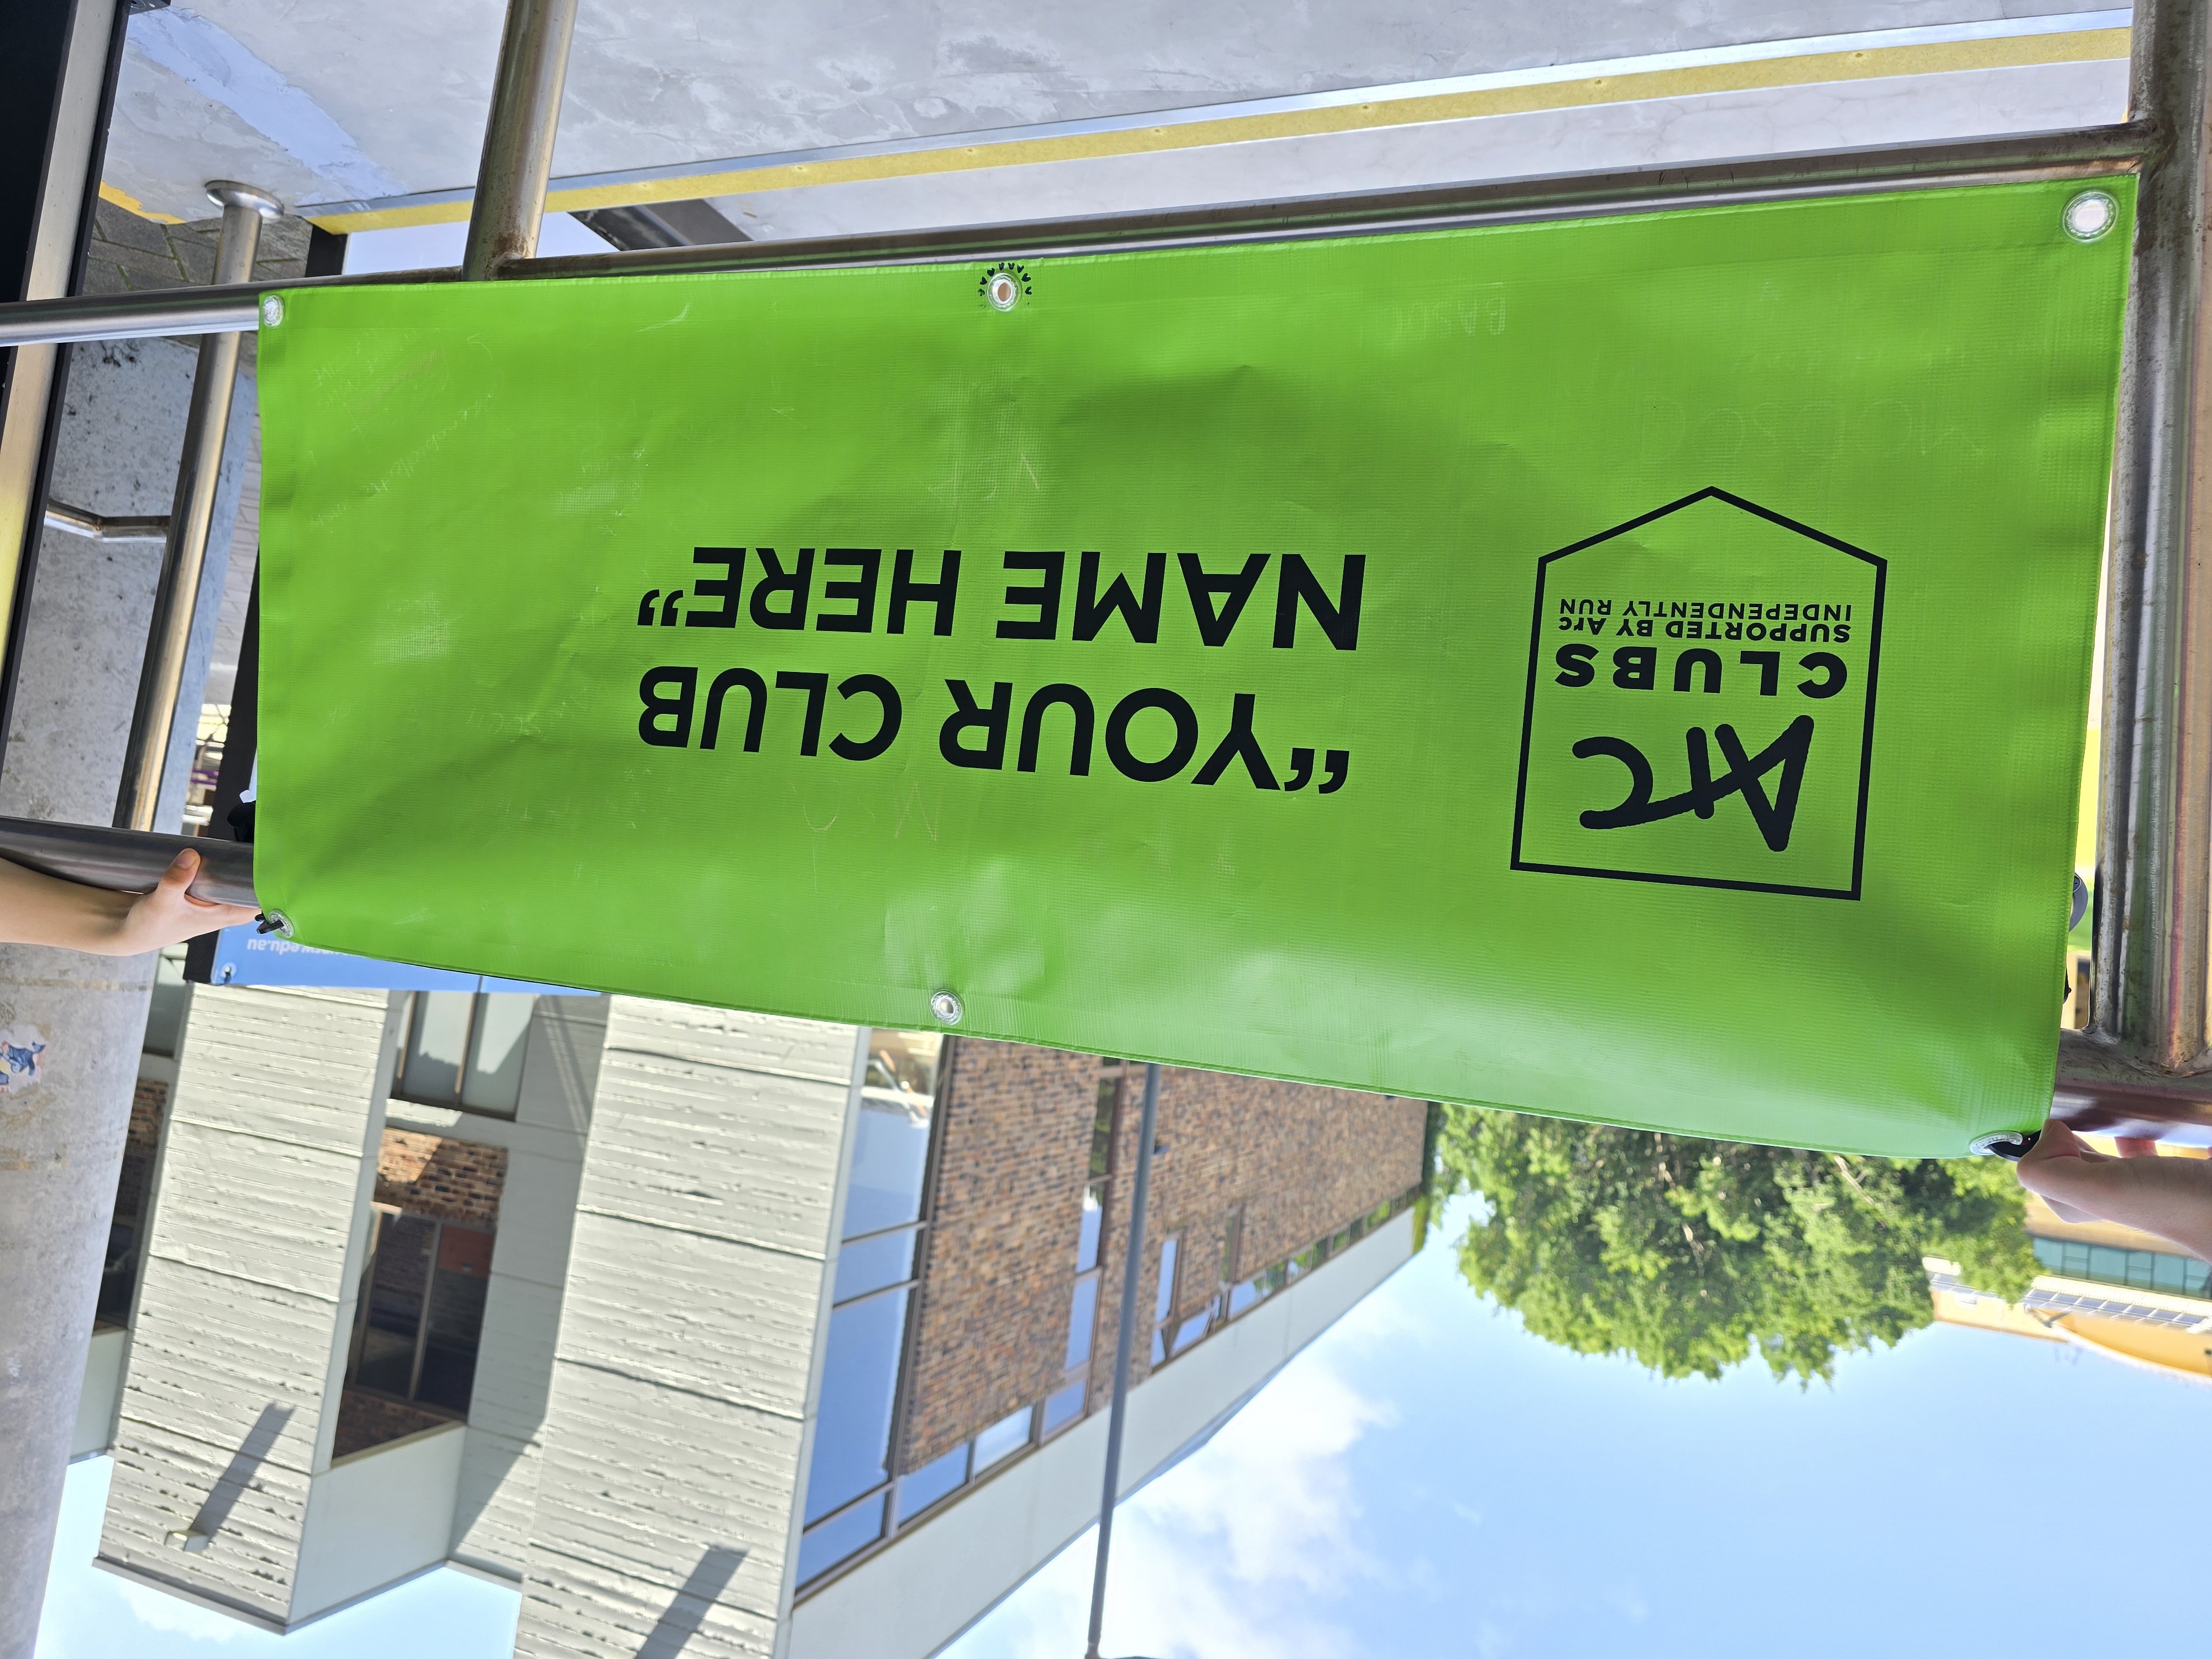
Step 4 - Hang your Club banner up!
Find a nice prominent spot at your event to hang your banner up so that your members know where to find you and/or know they’re in the right spot.
If you have lost your banner or don’t have one yet, you can instead print out an A3 copy of the Arc Clubs logo instead and place that at the event.
This is a requirement of your Affiliation to Arc.
Step 5 - Capture attendees details
The best way of capturing attendance at your event is to set up your Rubric ticketing to capture the following details:
- Full Name
- E-mail address
- Arc Member (Yes / No)
- Student Number
- Online username (If applicable)
Using the Rubric App, you can then 'check in' attendees by scanning their tickets. Once is the event is over, you can convert it into an Excel Spreadsheet which you can then upload when applying for the activities grant.
Step 6 - Take photos!
Capture the moment! The purpose of the Activity Photo is to have photographic evidence that your event did happen, show off your banner being displayed prominently, as well as for Arc Clubs to confirm your attendance sheet roughly matches your photo.
Oh and good for your own memories / social media of course! 😇

After Your Event
Step 7 - Collect receipts/invoices
Congratulations! Hopefully your event ran well and your members enjoyed themselves. Now, it’s time to get paid. Have your bank signatories reimburse any Executives that paid for items as soon as possible, and collect all receipts and invoices relevant to running the event.
You can find more details about what is and isn’t a valid receipt in the Funding & Grants page
Step 8 - Submit your grant application!
Log back on to your Club's Rubric page, it’s time to wrap this up.
First go to the Forms tab. And click on “Activity Grant”

Early in the form, you should see a dropdown to select the event you want to apply the Activity Grant for. Select it and let’s finish this.

Most details in the form will be pre-populated from before the event, so just complete the required sections start completing from here.
The required sections that need completing are:
- How many Arc members attended your event? (Number)
- How many People attended your event? (Number)
- Attendance List (UPLOAD EXCEL)
- Did your Club receive any income or make any expenditures associated with this activity? ****(Select the bracket that applies)
- Activity Photo (UPLOAD IMAGES)
- Attendance fees
- Income & Expenditures
- If you had income and expenses, you will be required to add details
- Terms and Conditions (AGREE)
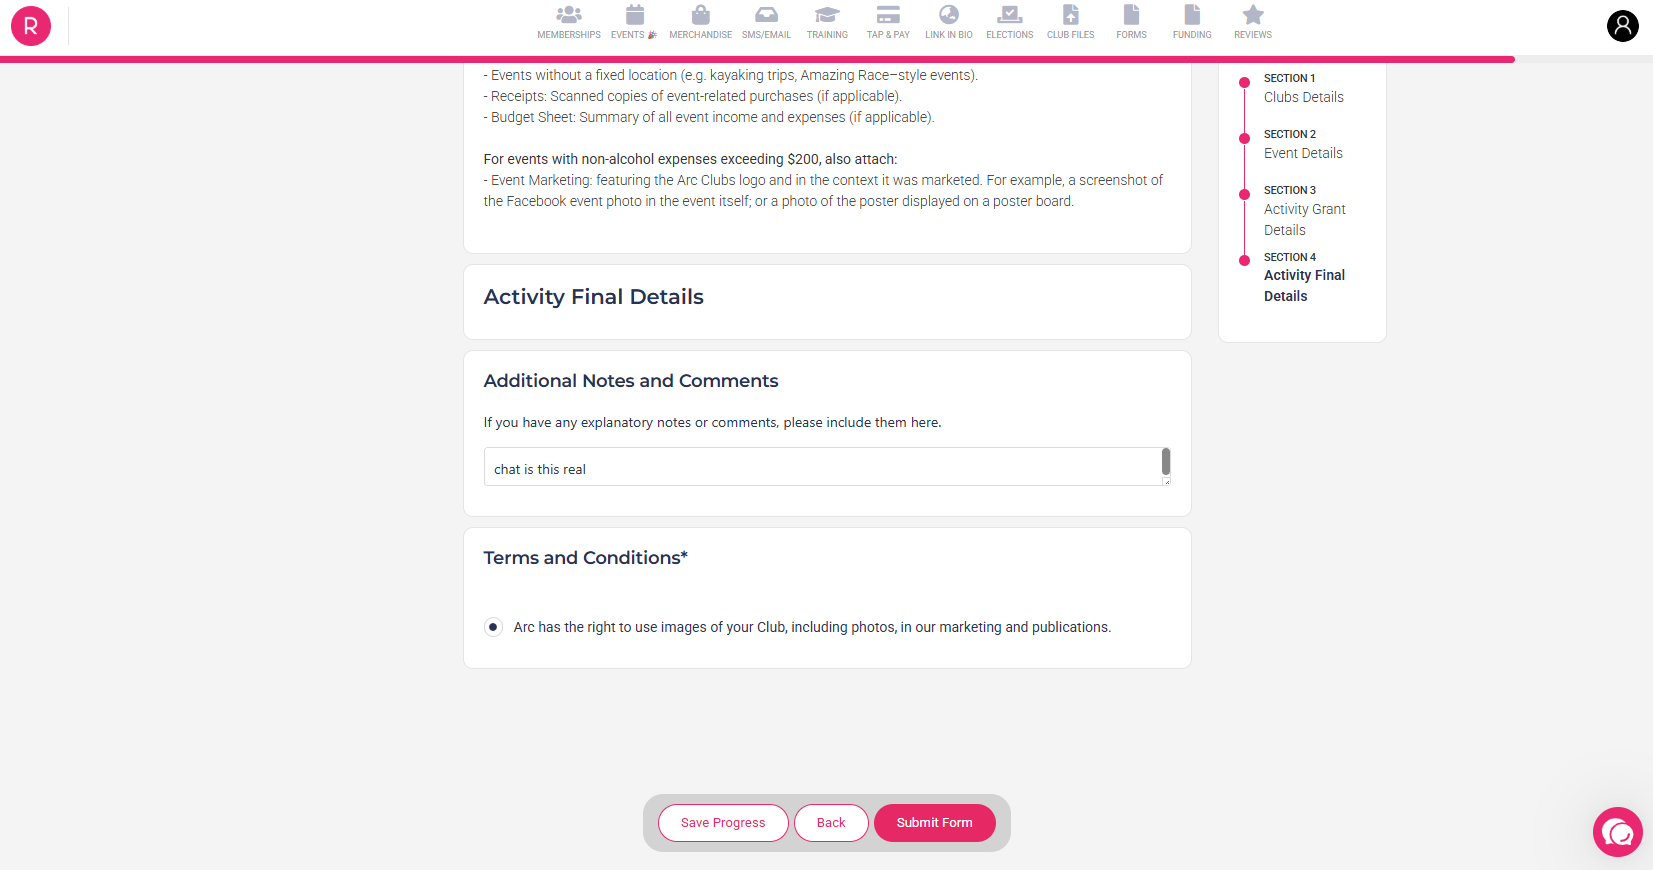
And that’s it! Hit “Submit Form” and wait for the Arc Clubs Team to process your submissions.
If there any issues with your grant application, the Clubs team will email your Club Email Address following up for more information if required. If none is required, you’re grant will be paid in the next round of grants (Typically every 1-2 months)